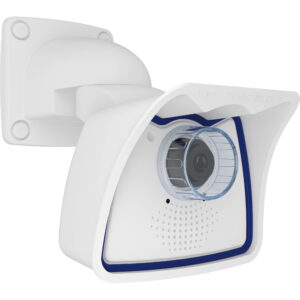
Mobotix M26 |
CathexisVision Camera Integration |
Driver: |
 |

| Datasheet | |||
| Unicast | |||
| CathexisVision Driver: | Mobotix | ||
| Number Of Cameras: | 1 | ||
| Number Of Streams: | 2 | ||
| Format: | MxPEG/JPEG | ||
| Transport: | Default | ||
| Audio: |
Audio IN works via on-board mic. Audio OUT not supported. |
||
| Resolution: | 6.2MP (3072×2048), 5.0MP (2592×1944), 3.1MP (2048×1536), 2.0MP (1920×1080), 1.2MP (1280×960), 0.9MP (1280×720), XGA (1024×768), 480kP (800×600), 442kP (768×576), 4CIF (704×576), VGA (640×480), 110kP (384×288), CIF (352×288), QVGA (320×240) and 19kP (160×120) | ||
| Multicast | |||
| Format: | Not supported | ||
| Audio: | N/A | ||
| Resolution: | N/A | ||
| Camera Events | |||
| Motion Detection | Supported (See Limitations) | ||
| Zones: | 2 | ||
| Trigger Message: | VM, VM2 | ||
| MxActivity Sensor | Supported but not tested | ||
| Trigger Message: | AS | ||
| Audio Detection | Supported but not tested | ||
| Trigger Message: | MI | ||
| I/O | |||
| Inputs: | N/A | ||
| Outputs: | N/A | ||
| Settings | |||
| Edge Review: | Not Supported. | ||
| Serial Port: | N/A | ||
| PTZ Control: | Not Supported | ||
| Cathexis Software: | CathexisVision 2017 SP3 and later | ||
| Camera Firmware: | MX-V5.0.1.53 | ||
| Limitations: |
To setup Motion Detection: 1.)Log in to cameras interface * Make sure all other events are inactive except for VM.
2.) Configuration for new profile: IP Notify type: (Custom) Destination address: (192.168.15.204 : 32121) (Select parallel send to all) Data Protocol: (Raw TCP/IP) (–nextimage–) DataType: (Plain Text) Send port: (0) * Set and then select Close button from the bottom of the screen. 3.) Configuration for the new action group: Enter a name for group -> select enabled -> select no time table -> select edit button -> Action Group: (Choose a name that you want to use) Event Selection: Choose (Select all) Action Details: (5) Add new Action -> Select your IP Profile created in the drop-down seen. ex(IP Notify:IP-Notify6). Set and the close using button on bottom of screen. |
||
| Cathexis Integrations |